How to Print an Image at Exact Size on Mac
Printing at an exact physical size means that a dimension entered in the app can be confirmed with a ruler on the final paper output. PrintTiler controls the tiled page geometry, while the macOS print dialog and the printer still need to pass those pages through without another scaling step.
Direct answer
How do you print an image at an exact physical size on Mac?
Open the file in PrintTiler, choose the real paper, select Custom Fit and Print Size, enter the final width and height, keep the aspect ratio locked, check Image Size in Output, then print at 100% or Actual Size and measure one known dimension before printing the full job.
Best for
- Posters, templates, signs, maps, artwork, and diagrams with a required physical size
- Mac users who need millimeter or inch dimensions rather than an approximate page count
Not for
- Correcting a source file whose dimensions are unknown and contain no measurable reference
- Eliminating mechanical tolerances in a home printer or paper feed
Works on
- Custom Fit > Print Size in PrintTiler 1.11.0
- Metric and imperial input with A4, Letter, and other supported paper sizes
Why PrintTiler instead
- Shows Image Size separately from the assembled paper footprint
- Keeps exact sizing, printable-area warnings, page preview, and tiled output in one Mac workflow
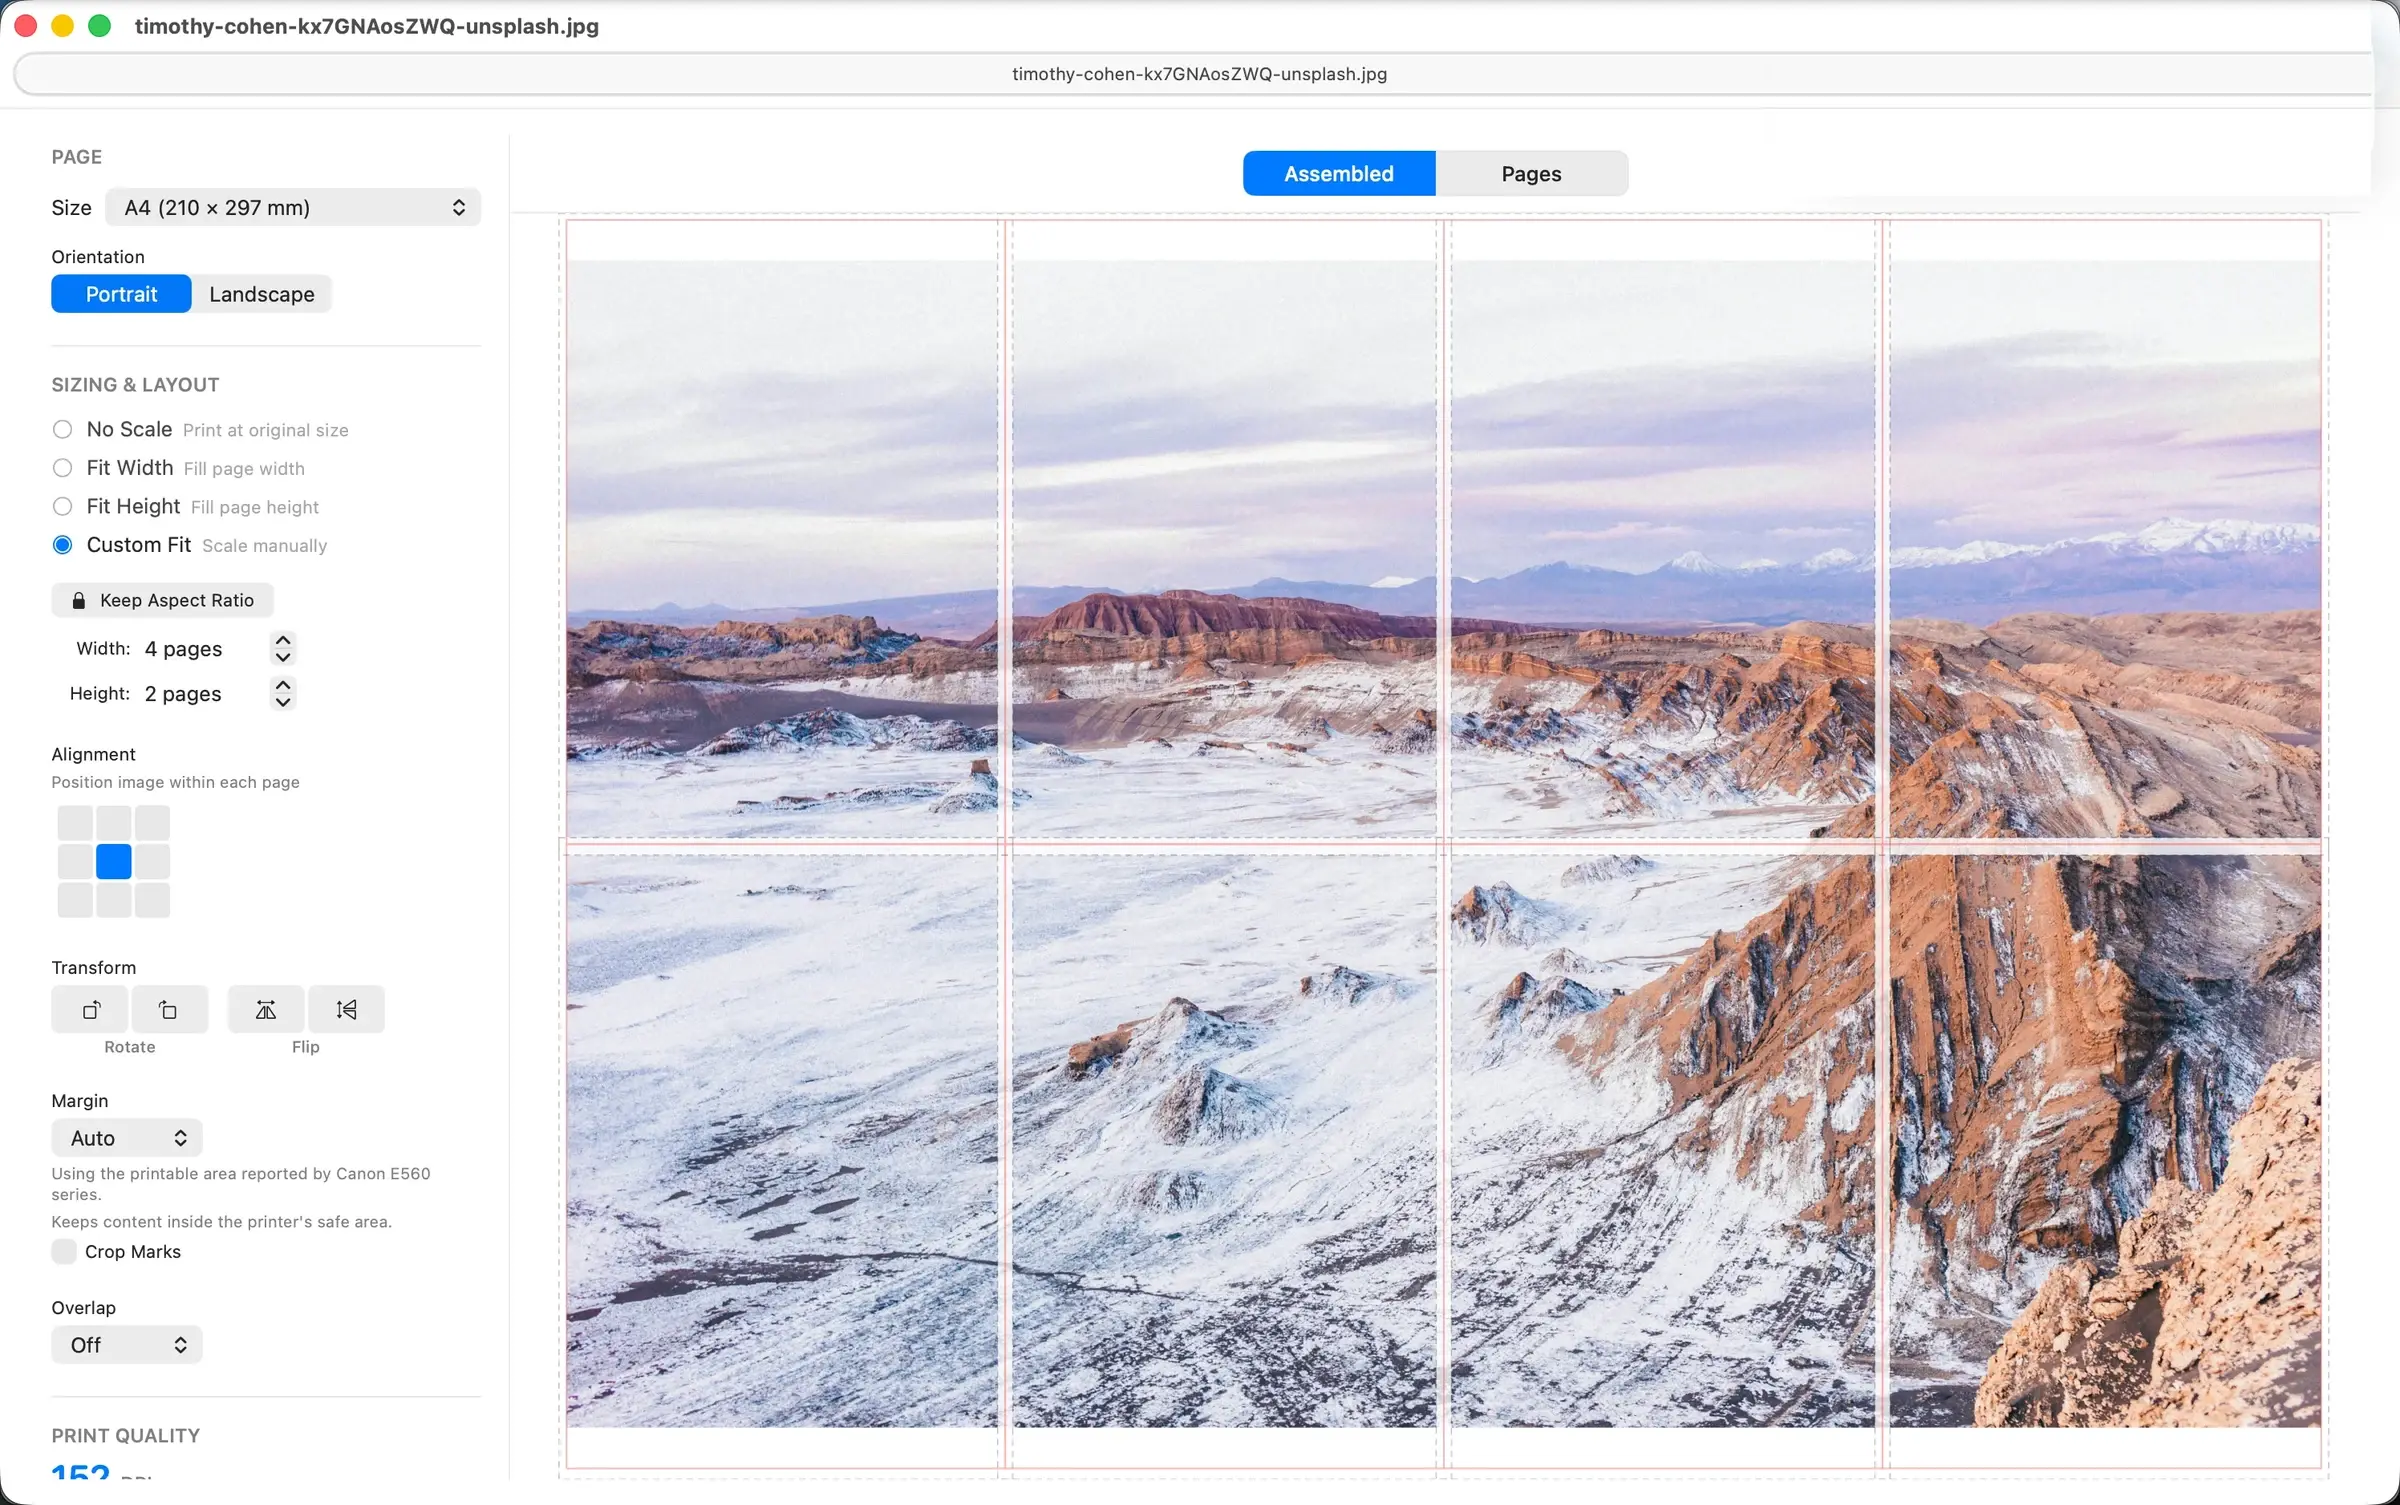
What "Exact Size" Means
Exact size is a physical result, not a screen zoom level or pixel count. If you enter a width of600 mm, the image content should measure 600 mm across after the tiled pages are aligned. The paper footprint can be larger because it also includes printer margins, blank page areas, and overlap.
Use Print Size When the Ruler Measurement Matters
Custom Fit combines two different goals. Pages is for a chosen sheet grid, such as 4 pages wide by 2 pages high. Print Size is for an exact final width and height. A page grid can be convenient, but it does not by itself guarantee a particular physical image dimension.
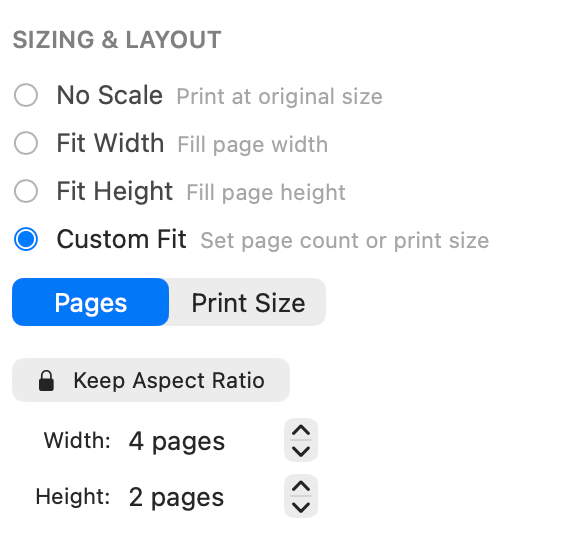
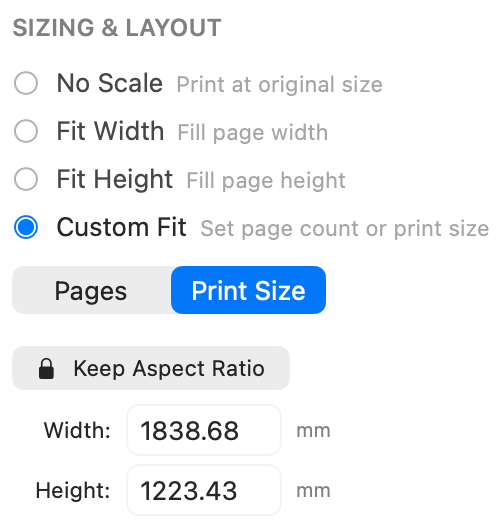
Keep Aspect Ratio Is the Safe Default
Leave the lock enabled and enter the dimension that matters most. PrintTiler calculates the other dimension from the source proportions. Unlock only when a deliberately stretched output is required; otherwise horizontal and vertical measurements will no longer use the same scale.
Exact-Size Workflow
Identify something measurable in the source
Use a dimension line, scale bar, test square, border, or another feature whose intended length is known. Without a known reference, you can set a final size but cannot independently verify its accuracy.
Select the paper that will actually be loaded
Match A4, Letter, orientation, and any custom paper dimensions across PrintTiler, the printer tray, and the macOS print dialog. A paper mismatch can trigger driver scaling even when the image size is correct.
Enter the final dimensions
Choose Custom Fit, select Print Size, and enter the target width or height. Keep the aspect ratio locked and confirm that the calculated second dimension matches the intended proportions.
Review the paper geometry separately
Set Margin to Auto when printer-safe edges matter. Add overlap only when the sheets will be assembled. These settings can change page count and Assembled Size, so confirm that Image Size still shows the target dimensions.
Check Output before using paper
Confirm page count, paper, Image Size, Assembled Size, resolution, margin, overlap, and printable-area warnings. A low estimated DPI affects sharpness, not the requested physical dimensions.
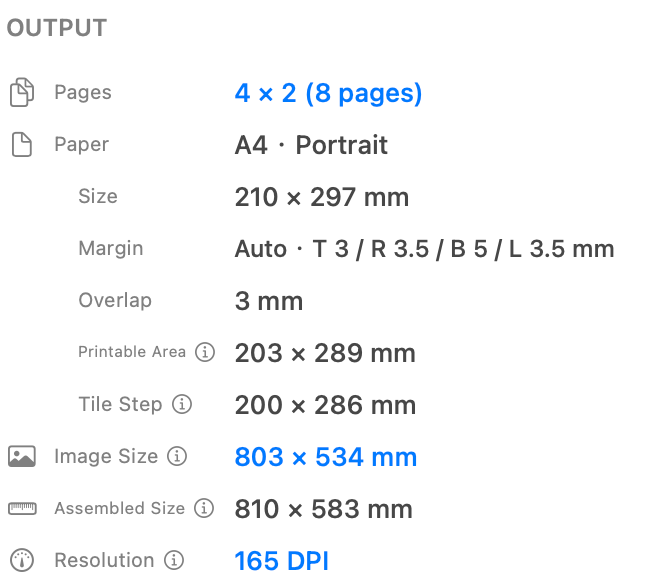
Print at 100% and measure before the full run
In the macOS print dialog, use 100% or Actual Size and disable Scale to Fit. Print a sheet containing the known reference, measure it horizontally and vertically, and continue only when the result is within the tolerance required by the project.
Verify the Result with Your Own File
Verification should use information already present in the project. A technical drawing may include a scale bar, a pattern may include a test square, and a sign layout may have a known border width. Measure the printed feature instead of relying on the application preview alone.
- Write down the intended X and Y dimensions before printing.
- Print the smallest useful subset that contains both references.
- Let the paper lie flat and measure with the same unit used in the source.
- Calculate the difference: printed measurement minus intended measurement.
- Repeat once before changing settings so random feed variation is not mistaken for a fixed scale error.
Choose a Tolerance Before You Print
A wall poster can tolerate more variation than a sewing pattern, stencil, or dimensioned plan. The file and software can preserve exact geometry, but the acceptable physical tolerance belongs to the project and printer.
Why the Paper Print Can Come Out the Wrong Size
If the test shows a repeatable proportional error after scaling is ruled out, follow theprinter calibration workflow. If the size is correct but outer content is missing, use the separate guide forprinter-edge clipping and printable-area problems. If the size is correct but seams are hard to assemble, use themargin and overlap guide.
What PrintTiler Can and Cannot Control
PrintTiler Controls
- Target Image Size
- Page grid and paper geometry
- Aspect ratio and intentional stretching
- Margin, overlap, and printable-area warnings
- Vector PDF dimensions and bitmap DPI estimates
The Printer Controls
- Driver scaling after the pages leave the app
- Borderless overscan
- Paper feed and roller variation
- Mechanical calibration and media handling
- The final physical tolerance on paper
Exact-Size Checklist
- The source contains a known dimension that can be measured
- The real paper and orientation match every part of the workflow
- Custom Fit is set to Print Size, not Pages
- Keep Aspect Ratio is enabled unless stretching is intentional
- Output Image Size matches the target dimensions
- The macOS print dialog uses 100% or Actual Size
- Borderless and Scale to Fit are disabled for measurement-critical work
- Horizontal and vertical references pass a measured test print
Frequently Asked Questions
How do I print an image at an exact size on a Mac?
In PrintTiler, choose Custom Fit, switch to Print Size, enter the final physical width and height, keep the aspect ratio locked, and print through the macOS dialog at 100% or Actual Size.
What is the difference between Pages and Print Size in Custom Fit?
Pages sets how many sheets wide and tall the output should be. Print Size sets the exact physical dimensions of the image itself. Use Print Size when a ruler measurement matters.
Why is my printed image smaller than the size shown in PrintTiler?
The macOS print dialog or printer driver may be applying Scale to Fit, shrinking to the printable area, or using a different paper size. Match the paper and orientation, disable extra scaling, and print at 100% or Actual Size.
Do margin and overlap change the target image size?
Print Size remains the target image size. Margin and overlap change the paper grid, page count, printable area, and assembled footprint around that image, so verify both Image Size and Assembled Size in Output.
What if horizontal and vertical measurements have different errors?
Different X and Y errors usually indicate stretching, a media or driver mismatch, or physical printer calibration rather than one uniform scale setting. Keep the aspect ratio locked and test both directions separately.
What if Save as PDF is correct but the paper print is not?
A correctly sized saved PDF shows that the prepared page geometry is correct. The remaining difference is in the system print settings, printer driver, paper handling, or printer mechanics.
Related Workflows
Compare all four fit modes in the scaling guide, preserve a PDF's native physical dimensions in the PDF guide, print a dimensioned plan with the blueprint and technical drawing workflow, or prepare a general poster with the multi-page image workflow.