How to Calibrate a Printer for Accurate Size on Mac
Some printers consistently make a page slightly larger or smaller than the geometry handed to macOS. PrintTiler's Physical Calibration measures that fixed error with a printed ruler sheet, then compensates the tiled layout separately in the horizontal and vertical directions.
Direct answer
How do you calibrate a printer on Mac?
In PrintTiler, select the target printer, open Physical Calibration, print the ruler-marked sheet at 100%, measure the printed rectangle along X and Y, enter both actual lengths, and apply the correction. Enable Use Physical Calibration before the final print.
Best for
- Repeated jobs where every print is proportionally too large or too small
- Sewing patterns, blueprints, templates, stencils, signs, and dimensional artwork
- Printers with different horizontal and vertical scale errors
Not for
- Color or density calibration
- Content clipped by non-printable margins
- Random paper skew, curl, or inconsistent feed
Works on
- macOS 11.5 or later
- PrintTiler 1.13 or later
What Physical Calibration Changes
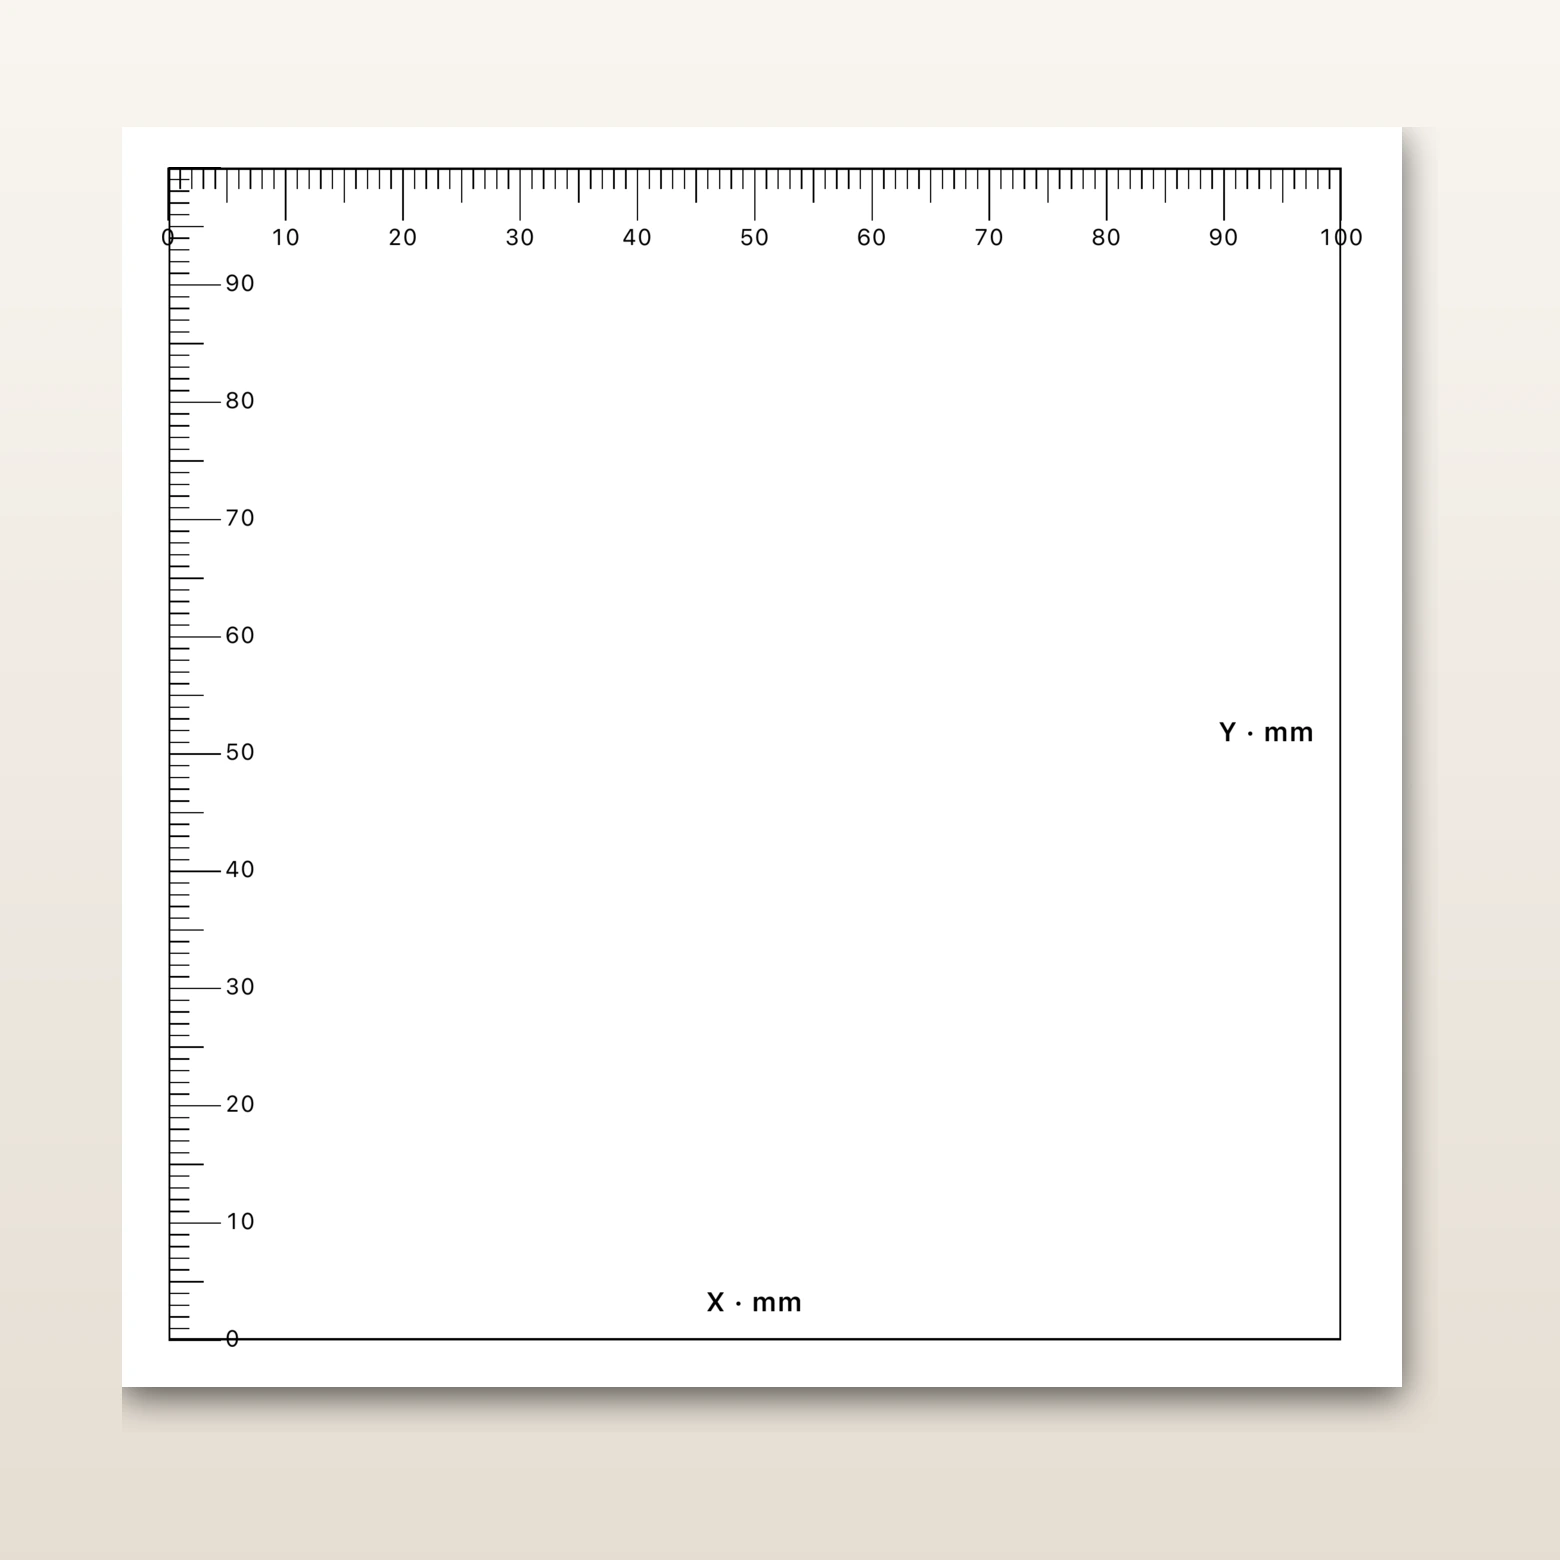
The calibration sheet contains a reference rectangle with ruler marks. After you measure the rectangle that actually appears on paper, PrintTiler saves a printer-specific correction. The correction is calculated independently for width and height, so a printer that feeds paper slightly long in one direction does not have to share a scale with the other direction.
Keep the correction in range
PrintTiler accepts corrections from 80% to 120%. A result outside that range is a signal to stop and check measurement, paper preset, orientation, or driver scaling before trusting a print.
Prepare a Reliable Test
Calibration measures a fixed tendency, so the test should isolate that tendency from one-off mistakes. Use the printer and media that will produce the final job whenever possible.
- Select the target printer in PrintTiler, not another available printer.
- Load one flat batch of the paper used for the final output.
- Choose the normal orientation and let the calibration sheet use the printer's reported printable area.
- Print at 100% and disable any Scale to Fit, Fit to Page, shrink-to-fit, or borderless overscan option.
- Use a rigid ruler or caliper and measure at room temperature after the ink or toner has dried.
Measure the rectangle, not the sheet
The printed page can include margins and blank space. Measure from the corresponding calibration lines along the X and Y edges. PrintTiler labels the current measurement unit and shows the expected reference lengths.
Print, Measure, and Apply the Correction
Select the printer and open calibration
In PrintTiler's Printer section, choose the printer for the final job. Click Calibrate. After a calibration exists, the same control appears as Edit.
Print the calibration sheet
Print the sheet without printer-driver scaling. Keep the same paper and orientation as your final job. PrintTiler prepares ruler marks so the reference is easy to measure after it leaves the printer.
Measure X and Y separately
Measure the horizontal rectangle between the X marks, then the vertical rectangle between the Y marks. Record both values in the unit shown on the sheet. Repeat the measurement if the first two readings differ by more than your project tolerance.
Enter the measured lengths
Enter the actual X and Y measurements in the calibration sheet. PrintTiler displays the resulting X Scale and Y Scale and enables Apply only when both corrections are valid.
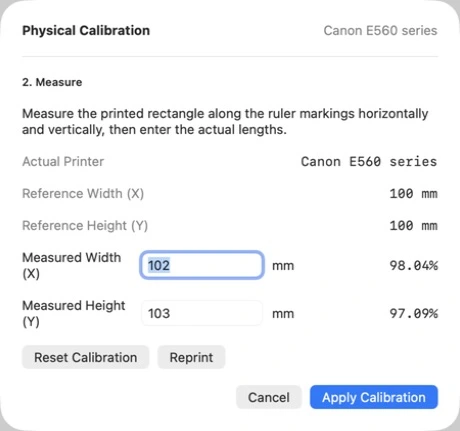
Screenshot from PrintTiler 1.13. The reference and measured values shown here are examples; your printable area and measurements can differ.
Apply and enable the saved correction
Click Apply Calibration. Back in the Printer section, confirm the X/Y status and leaveUse Physical Calibration enabled for jobs that should use it.
Confirm the output before using paper
Check the Output summary for the active Calibration line and Compensated Size. In the macOS print panel, select the same printer used for calibration. If the printer changes, PrintTiler warns that the saved correction may not match the destination.
Verify and Interpret the Result
A successful calibration should turn a repeated proportional error into a result close to the requested dimensions. It cannot compensate for an error that changes from sheet to sheet or for content that starts outside the printable area.
If calibration is not the issue, compare the app geometry with the paper result in theexact-size printing workflow, or trace the cause with the wrong-size print diagnosis. For clipped edges, use theprinter-edge clipping guide. If sheets need trimming room, set up margin, overlap, and crop marks.
Printer Calibration Checklist
- The target printer is selected and Ready
- The final paper type, size, and orientation are loaded
- The macOS print dialog uses 100% scale and no Fit to Page setting
- Horizontal and vertical measurements are taken on the printed rectangle
- Both readings are repeated and recorded in the current unit
- X and Y corrections are within 80–120%
- Use Physical Calibration is enabled
- Output reports the active calibration and the macOS print panel targets the calibrated printer
Frequently Asked Questions
How do I calibrate a printer for accurate size on a Mac?
In PrintTiler, select the target printer, open Physical Calibration, print the calibration sheet at 100%, measure the rectangle horizontally and vertically, enter the actual lengths, and apply the calculated X/Y correction.
Does printer calibration fix colors?
No. Physical Calibration corrects measured physical size in the horizontal and vertical directions. It is not an ICC profile, color-management tool, or replacement for printer maintenance.
Why are horizontal and vertical corrections separate?
Paper feed, roller pressure, media handling, and mechanical tolerance can affect the two axes differently. Separate X and Y measurements avoid forcing a single scale onto a non-uniform printer error.
What correction range does PrintTiler accept?
PrintTiler accepts measured corrections between 80% and 120%. A result outside that range usually means a measurement, paper-size, orientation, or printer-driver scaling error rather than normal printer drift.
Should I recalibrate after changing paper?
The calibration is saved for a printer, not a color profile. Re-run the measurement if a different media type or systematic error changes the result, and use the same flat media for calibration and critical output.
Will calibration fix missing edges or random page alignment?
No. Use Auto or manual Margin for non-printable edges and Overlap plus Crop Marks for assembly tolerance. Random feed changes, skew, or missing edges need paper handling or printer service rather than scale calibration.
Related Workflows
Set a target dimension in the exact-size guide, preserve a PDF's dimensions in the large-PDF workflow, or prepare a sewing pattern at actual size.